Documentation
Everything you need to run Sendrel. Five minutes, start to finish.
01 Installing
Find Sendrel on the Zendesk Marketplace and click Install. Zendesk asks which account to install it into and starts the 14 day trial. No card entry. Billing runs through your Zendesk invoice if you keep it.
02 Connecting
On first run, an administrator authorizes the app. Sendrel requests two OAuth scopes, tickets:read and tickets:write, and nothing else. That is enough to read comments you choose to forward and to write replies back as internal notes.
03 Forwarding comments
Open a ticket and open the Sendrel sidebar. Each comment has a checkbox. Tick the ones the recipient should see. Internal notes are marked and excluded by default; you can include one deliberately if you need to.
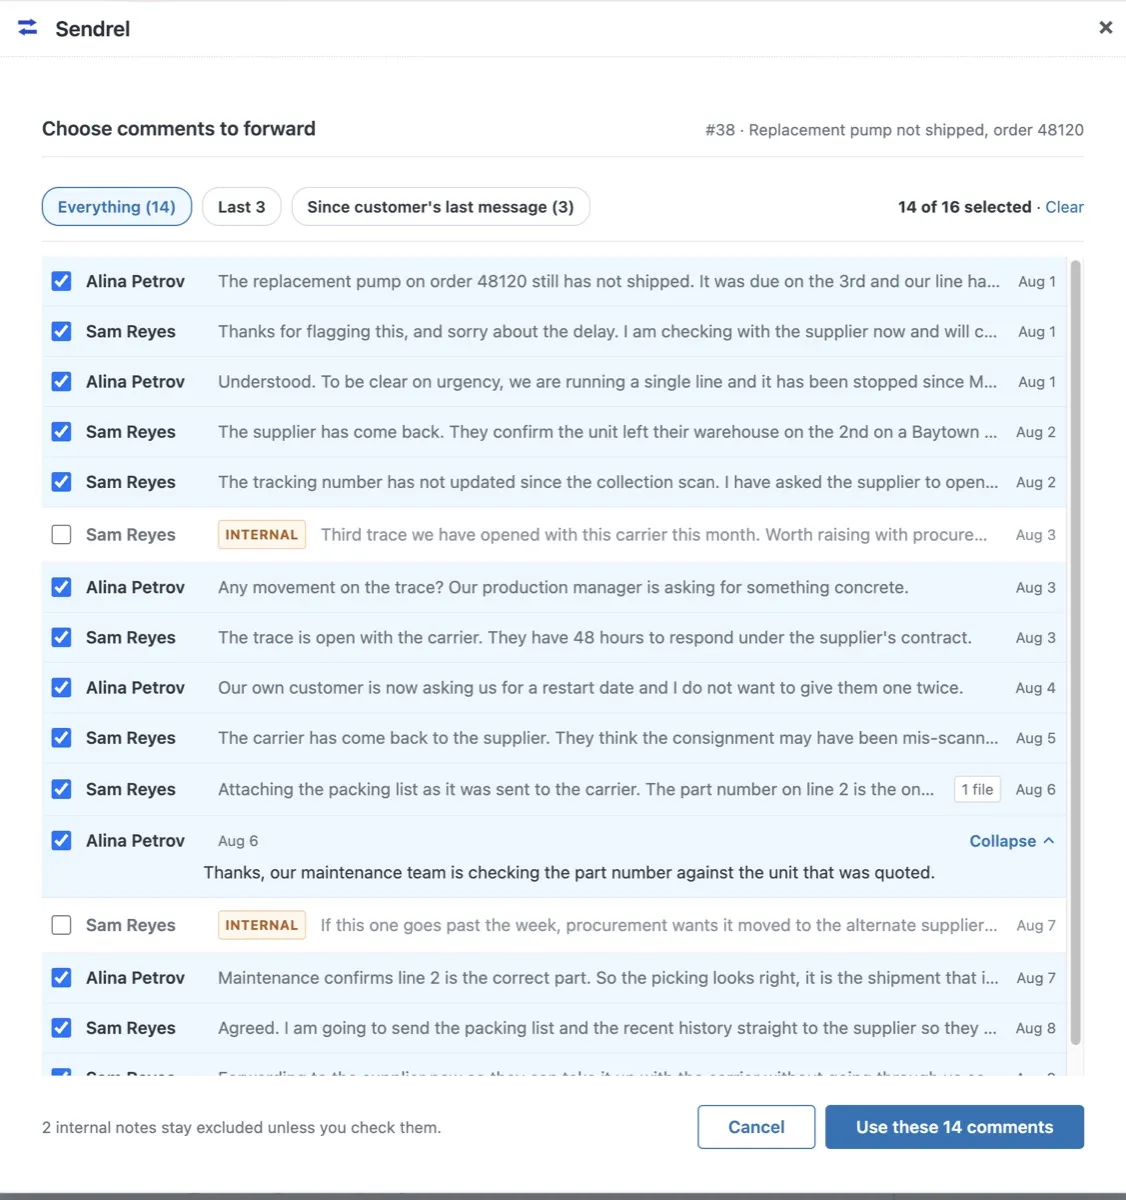
Pick a recipient, add a short note if you like, and send. Attachments on the selected comments are included.
04 The address book
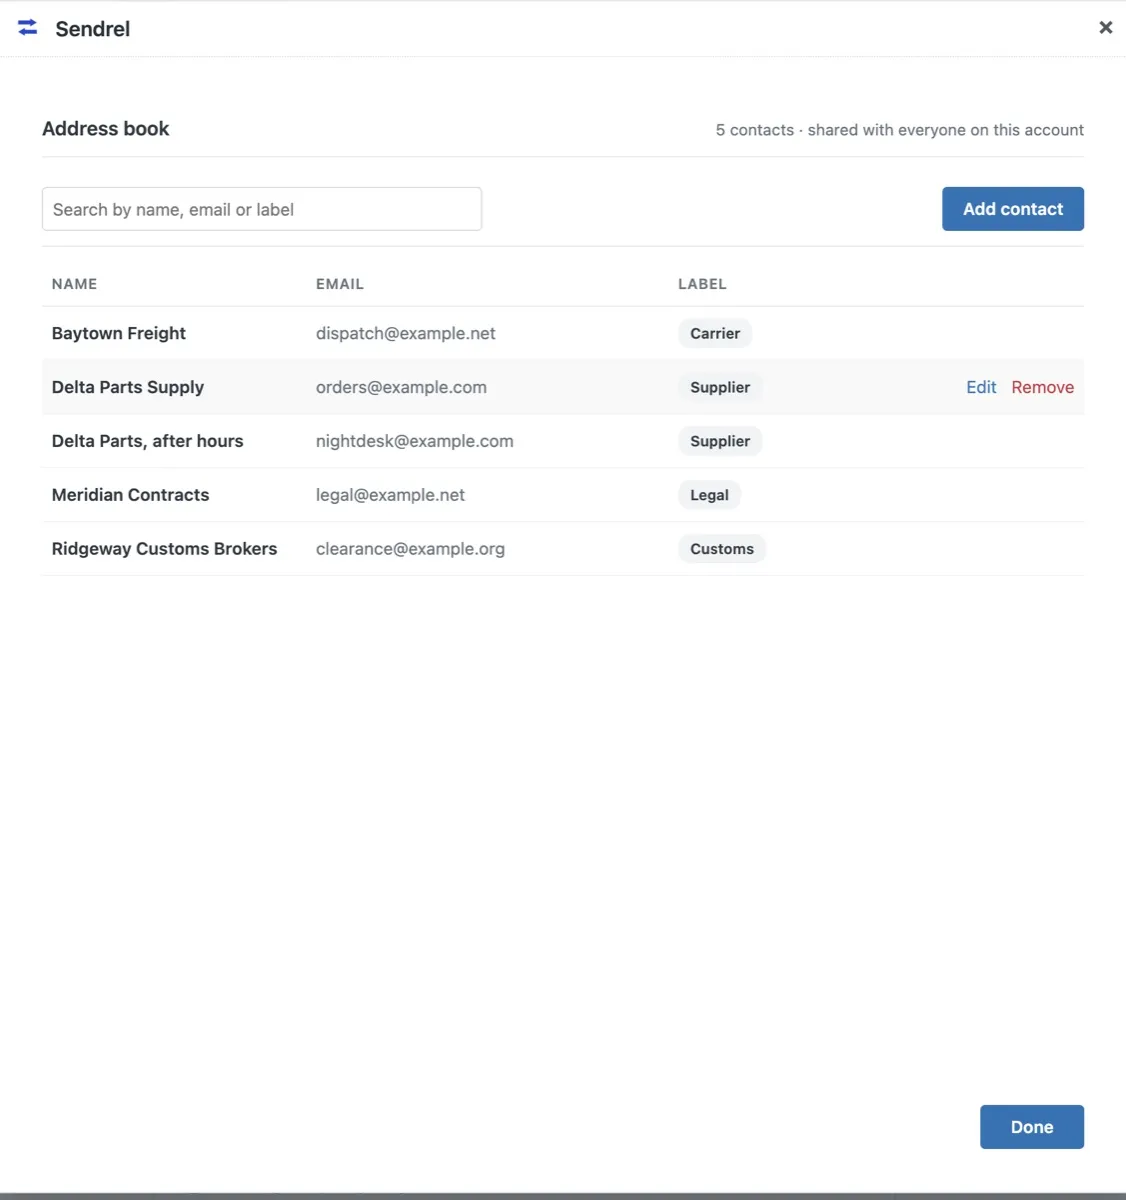
Contacts are shared across the account. Save a contact once, with a name and an address, and every agent can pick it from the recipient list. You can also type any address directly; typing does not save it unless you choose to.
05 The summary
Instead of forwarding the raw comments, you can ask Sendrel to draft a short factual summary of the selected comments. The draft appears in an editor. Read it, change it, then send. Nothing goes out without you reviewing it.
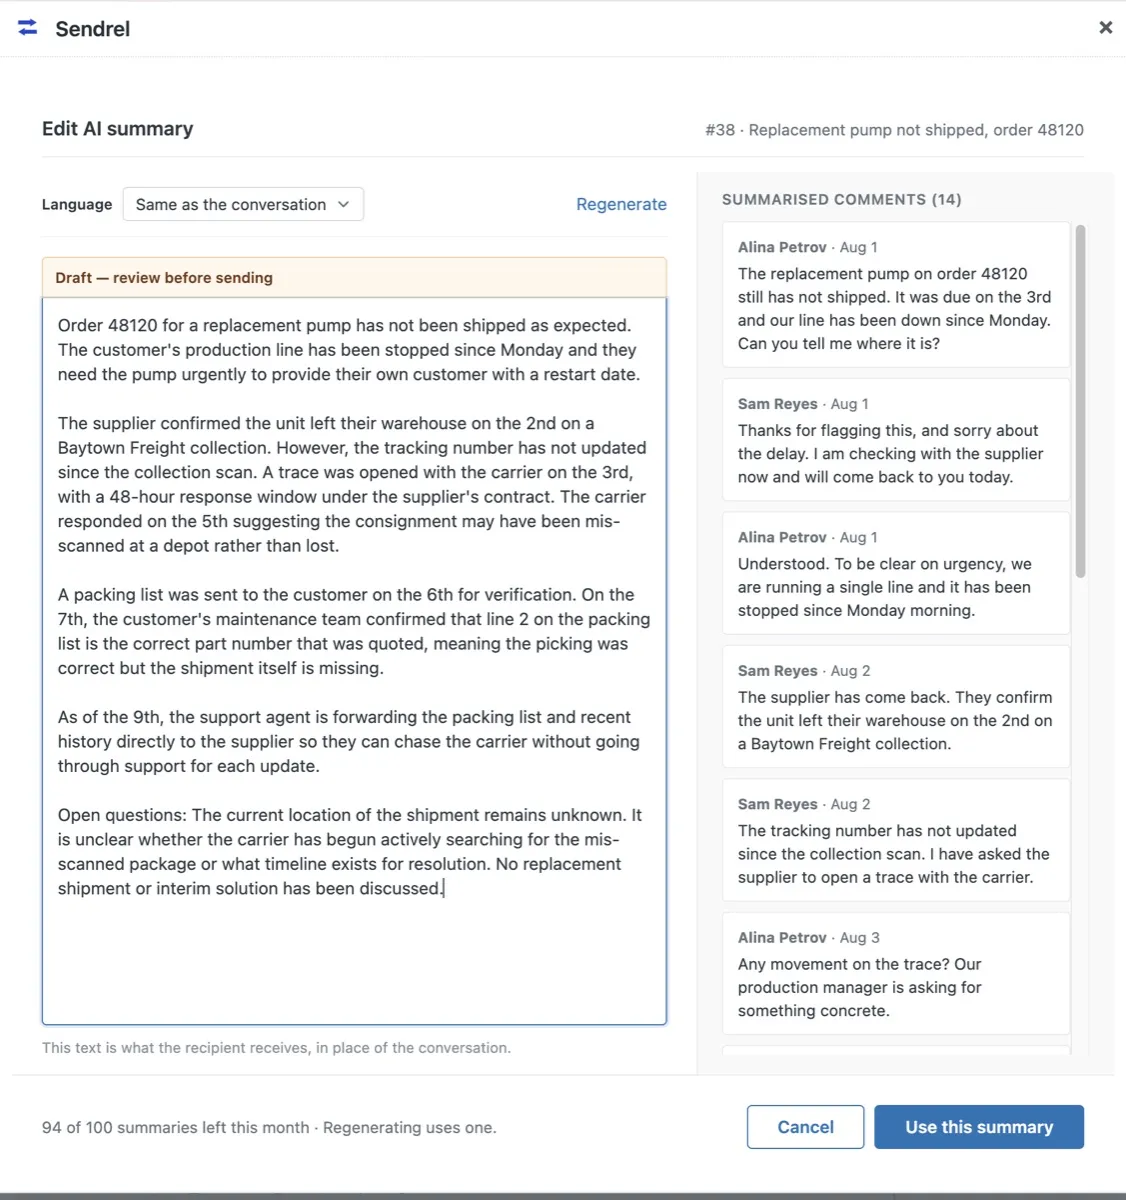
The feature is opt in per send. It can also be turned off for the whole account, from the link under the summary option in the sidebar, which is offered to administrators. See the privacy page for how summary requests are handled.
06 Replies
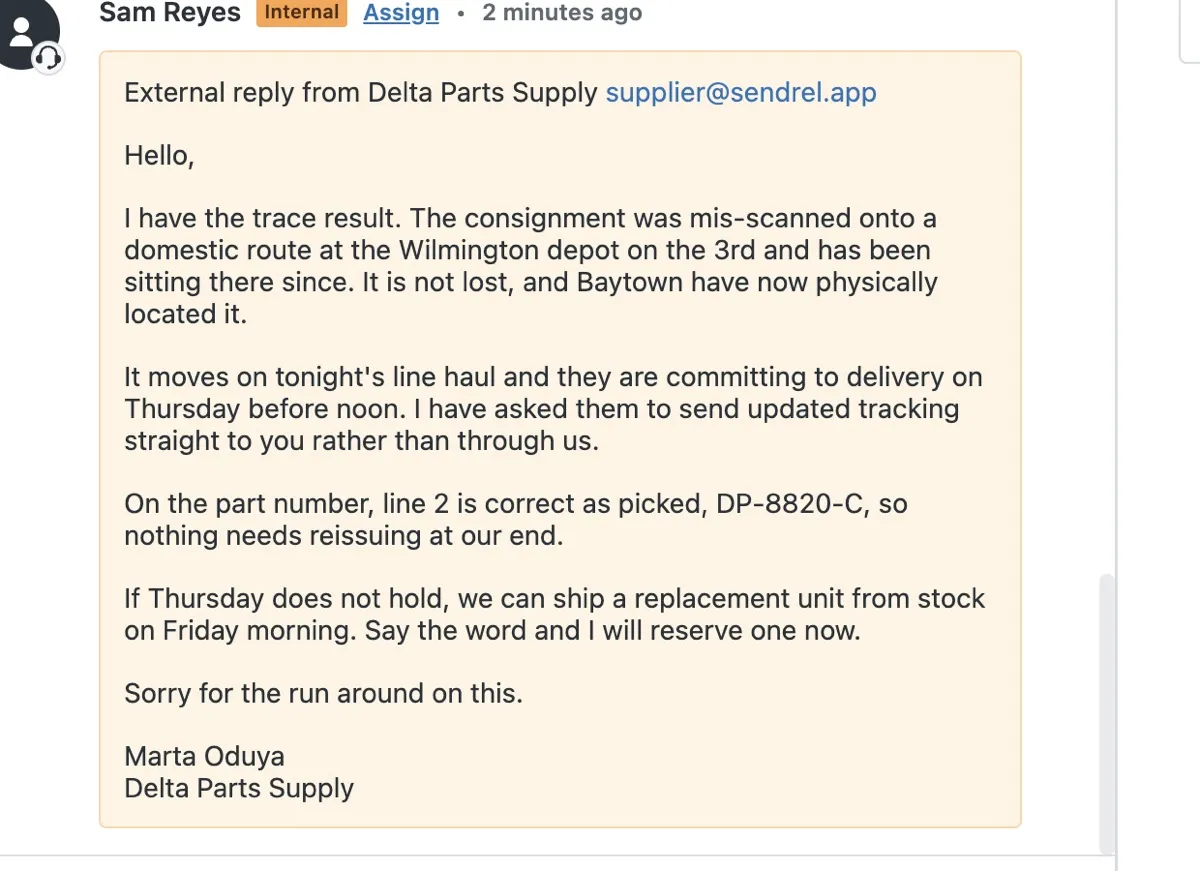
When the recipient replies to a forwarded email, the reply is added to the original ticket as an internal note, with any attachments. The agent does nothing. If a reply arrives after a ticket is closed, it is added to the ticket's follow-up.
07 If a forward lands in junk
The first Sendrel email a recipient receives may go to their junk or spam folder. This is normal for a domain the recipient has never had mail from before, and it is worth telling a supplier to check once rather than assuming the message failed.
It is not a misconfiguration. Sendrel mail is signed and authenticated: SPF, DKIM and DMARC all pass, and the messages carry no tracking, no images and no links. What filters weigh in addition to that is whether they have seen the sending domain before, and for a new recipient the answer is no.
Two things fix it, both on the recipient's side. Marking the first message as not junk, and adding forward@sendrel.app to their contacts. After that, mail from Sendrel behaves like any other correspondence. It also settles by itself as the domain becomes familiar to the receiving system.
If a recipient tells you they never received a forward, check the ticket first. The forward is recorded there as an internal note naming who it went to and when, so you can tell the difference between a message that was never sent and one sitting in a junk folder.